So, we made all those lovely bento fillers last week, and I had a goal to make pretty little arranged bentos all week, and then my week kind of fell apart. I won't go into it, but it was quite stressful. In the end, I only got one day of true bentos in.They were, however, quite impressive. I had a lot of fun putting them together.
Brandon's bento is the green one. He wanted an upright bento to fit in his messenger bag. This is pretty much the only upright bento available right now. It's a bit expensive, but worth the splurge. Plus it looks super chic!
After Monday, we were back to just throwing things into tupperware containers like usual, but it was still way worth it to make bento food ahead of time. All week, I didn't have to cook once, which was super handy. That's exactly why bentos are such a time saver, even if you don't go to all the trouble of decorating them!
It's a long way from Michigan to Texas, so here's a little record of what we've been up to.
Sunday, February 12, 2012
Sunday, February 5, 2012
Onigiri (Rice Balls)
Brandon and I like to pack our lunches for work every day. I find that it's healthier and more cost-effective, and it's far less work than a lot of people think. Generally, I cook a huge batch of something on the weekend, then every morning while we're having breakfast, I throw a portion of it into two tupperware containers, which we reheat at lunchtime. It's a lazy approach, but it gets the job done.
Well, not this week. This week I wanted to get back into doing traditional Japanese bento lunches. So, we made a batch of dumplings a few days ago, and today we made a big batch of onigiri as well.
Onigiri is like the Japanese PB&J. It's just a really standard, comfort-food that is simple, yummy and filling. I'd like to walk you through how to make a couple different kinds of onigiri.
First, you need to make your filling. There are a number of traditional fillings, like pickled plums and salted salmon, but I make a slightly more Americanized filling. It has chicken, carrots and onion. You chop them up roughly and cook them in a skillet with soy sauce, brown sugar, and a dash of lemon juice.
You can play with the sauce if you want, but I prefer to season it very simply. I think this is an appropriate approach, since Japanese food is quintessentially clean and simple. Once the mixture has cooled a bit, put it through the food processor and get it chopped up very fine.
Next you need your rice! Nishiki, or sushi rice, is best. It's stickier than Chinese rice and is specifically made for this sort of thing. I use my rice cooker, but I know it can be done on a stove, it just takes a little practice.
You can make the filling ahead of time, but the rice absolutely must be fresh. It has to be hot and sticky in order to hold together properly, so make it right when you need it. If it cools to room temp, it's no good for onigiri.
The setup is a bit complex, but I'm also notoriously messy when I make onigiri, so that might be my fault. The main thing you will need is a bowl if warm salt water. You'll have to constantly dip your hands in the salt water so the rice doesn't stick. This can make a bit of a mess, so I keep a dish towel across my lap to catch drips of water and stray grains of rice.
If you want, you can use fancy onigiri presses, or you can just make them free-hand. Each approach has strengths and weaknesses. I'll show you how to do both.
So let's start with a traditional onigiri. First, get your hands wet in the salt water. This is way more necessary than you might think.
Then take a handful of rice - be careful, it can be extremely hot right at the beginning. Press it firmly into a ball.
Then do a "pinch-pot" sort of move with your thumb or fingers and create an opening. You want it to be large enough to spoon in the filling.
It's okay if the ball starts to fall apart, just cradle it in your hand so it mostly retains its shape.
Now spoon in the filling, making sure to keep it all in the opening. You want to use a tiny spoon, a teaspoon or smaller. The Japanese like their food to look very clean and plain, so try to keep the filling on the inside, so the outside of the ball is pure white when you're done. This part is tricky and takes practice, so don't worry if you don't get it right away.
By the way, at this point I've probably re-dipped my right hand in the saltwater at least about 5 times. You'll find yourself losing some grains of rice in the water bowl, that's okay. The important part is that you don't have rice sticking to your hands, and your onigiri aren't falling apart.
Once you have the filling in, you want to close the rice around it. If you've overstuffed the onigiri (which I do very often) you can grab more rice to cover the gaps. Once everything is covered, you can carefully shape the ball until you like it.
Today I just did traditional triangles and plain spheres, but in the past I've done some really fancy shapes. This is a photo from a few years ago:
Well, not this week. This week I wanted to get back into doing traditional Japanese bento lunches. So, we made a batch of dumplings a few days ago, and today we made a big batch of onigiri as well.
Onigiri is like the Japanese PB&J. It's just a really standard, comfort-food that is simple, yummy and filling. I'd like to walk you through how to make a couple different kinds of onigiri.
First, you need to make your filling. There are a number of traditional fillings, like pickled plums and salted salmon, but I make a slightly more Americanized filling. It has chicken, carrots and onion. You chop them up roughly and cook them in a skillet with soy sauce, brown sugar, and a dash of lemon juice.
It doesn't matter how you chop them, they're going in the food processor soon after.
You can play with the sauce if you want, but I prefer to season it very simply. I think this is an appropriate approach, since Japanese food is quintessentially clean and simple. Once the mixture has cooled a bit, put it through the food processor and get it chopped up very fine.
If you have excess sauce, you can pour it back over the finished mixture. The more flavor the better, there's going to be a LOT of rice at the end.
Next you need your rice! Nishiki, or sushi rice, is best. It's stickier than Chinese rice and is specifically made for this sort of thing. I use my rice cooker, but I know it can be done on a stove, it just takes a little practice.
The rice has to be hot when you use it.
You can make the filling ahead of time, but the rice absolutely must be fresh. It has to be hot and sticky in order to hold together properly, so make it right when you need it. If it cools to room temp, it's no good for onigiri.
The setup is a bit complex, but I'm also notoriously messy when I make onigiri, so that might be my fault. The main thing you will need is a bowl if warm salt water. You'll have to constantly dip your hands in the salt water so the rice doesn't stick. This can make a bit of a mess, so I keep a dish towel across my lap to catch drips of water and stray grains of rice.
Pajamas are totally appropriate onigiri-making attire.
If you want, you can use fancy onigiri presses, or you can just make them free-hand. Each approach has strengths and weaknesses. I'll show you how to do both.
Top right is traditional triangular onigiri. Top left is - I believe - a sushi press. Bottom two are for decorative "kawaii" onigiri shapes.
So let's start with a traditional onigiri. First, get your hands wet in the salt water. This is way more necessary than you might think.
Without the salt water, you will end up with rice-hands rather than onigiri. Trust me on this.
Then take a handful of rice - be careful, it can be extremely hot right at the beginning. Press it firmly into a ball.
Step 1.
Then do a "pinch-pot" sort of move with your thumb or fingers and create an opening. You want it to be large enough to spoon in the filling.
Does anybody remember pinch-pots except me?
It's okay if the ball starts to fall apart, just cradle it in your hand so it mostly retains its shape.
If I put this down, it would fall apart immediately, but that's ok! Because I'm not going to put it down.
Now spoon in the filling, making sure to keep it all in the opening. You want to use a tiny spoon, a teaspoon or smaller. The Japanese like their food to look very clean and plain, so try to keep the filling on the inside, so the outside of the ball is pure white when you're done. This part is tricky and takes practice, so don't worry if you don't get it right away.
I use the back of the spoon to smoosh the filling down, so it doesn't spill out when I try to close the ball.
By the way, at this point I've probably re-dipped my right hand in the saltwater at least about 5 times. You'll find yourself losing some grains of rice in the water bowl, that's okay. The important part is that you don't have rice sticking to your hands, and your onigiri aren't falling apart.
Once you have the filling in, you want to close the rice around it. If you've overstuffed the onigiri (which I do very often) you can grab more rice to cover the gaps. Once everything is covered, you can carefully shape the ball until you like it.
This would be a traditional triangle shape.
Today I just did traditional triangles and plain spheres, but in the past I've done some really fancy shapes. This is a photo from a few years ago:
Diggin' things up from the blog archives!
As you can see, I added the seaweed early on. I learned very quickly that this is a bad move, it makes the onigiri taste fishy. So, as cute as it can be, leave the seaweed off until it's time to eat them. In any case, all the onigiri in that photo are hand-made! So, the fancy shapes can be accomplished without an onigiri press. But it does make things quicker. So here's how I use mine:
First, put a tiny bit of rice, and try to make a well for the filling with your finger.
These are going to be more like snack onigiri. They're very small.
Add the filling,
Some of the filling will show on the sides, it's sort of unavoidable with these molds.
Then top them off,
Pile it high for a better result.
Then replace the lid and squeeeeeeeeeeeze!
Trying to look excited even though I'm exhausted.
The end result is adorable!
The hand-made onigiri are more dinner-size, whereas these are more lunch- or snack-size.
Lastly, you can make onigiri with rice seasoning (furikake) mixed throughout rather than filling spooned into the center. I use a mason jar to get the seasoning mixed evenly throughout the rice. If you do it right, you can mix the rice ball right there in the mason jar. It's tricky though, I've only gotten it to work once or twice. You have to shake it at just the right angle for it to arrange neatly into a ball.
On the right is egg-flavored (tamago) and on the left is salmon.
Ready to rock! Or shake, as the case may be.
Action shot!
Done! And oh-so pretty!
Since there is no protein and no vegetables in this type of onigiri, it's definitely meant as a side dish. But it can be a fun, decorative alternative to putting your stir fry over rice.
The veeeery last step is to cut up some seaweed to put over the onigiri. This adds some crunch and flavor, but mostly, it keeps the rice from sticking to your hands.
It comes in square sheets for wrapping sushi, but for onigiri you just need small strips.
"... Can I eat it now?"
Now THAT is a happy customer.
I'll show you guys some photos of our bento lunches later in the week!
Friday, February 3, 2012
Dessert Red Alert
I know I haven't been around much lately, and I apologize for that, but we've no time for small talk! I have a dessert emergency! Pay close attention!
If you're ever making dumplings, like these:
and you find yourself with leftover dough, then PAY ATTENTION TO THE FOLLOWING:
Fill the dough with Nutella, fold it closed, and place it in a hot skillet with plenty of canola oil.
Fry until both sides are crispy.
And cover with confectioner's sugar!
If you do not have any dough, DO NOT FRET! Simply walk, do not run, to your nearest... um... container of flour, because the recipe for dumpling dough is simple:
3 parts flour to one part water.
Bam. Done. Easy-peasy.
Enjoy!
Tuesday, January 17, 2012
Christmas Morning: Hors D'eouvres Party
My grandpa has 8 siblings. They each got married and had kids, and their kids all had kids. This massive family gets together every year on Christmas morning for a laid-back little shindig in Burlington, Ontario.
I just love the atmosphere. People mingle around the room, chatting and catching up. And I've heard it said multiple times that if you bother to bring a boyfriend or girlfriend to Burlington, it had better be a serious relationship, because otherwise what's the point of overwhelming them with so many relatives!* It's a truly, truly crowded party.
But aside from seeing all my great aunts and uncles, one of the things I like about the Burlington party is the creative food. It's all finger-food, and it's all insanely rich. I was able to snap a few photos after the crowd had cleared.
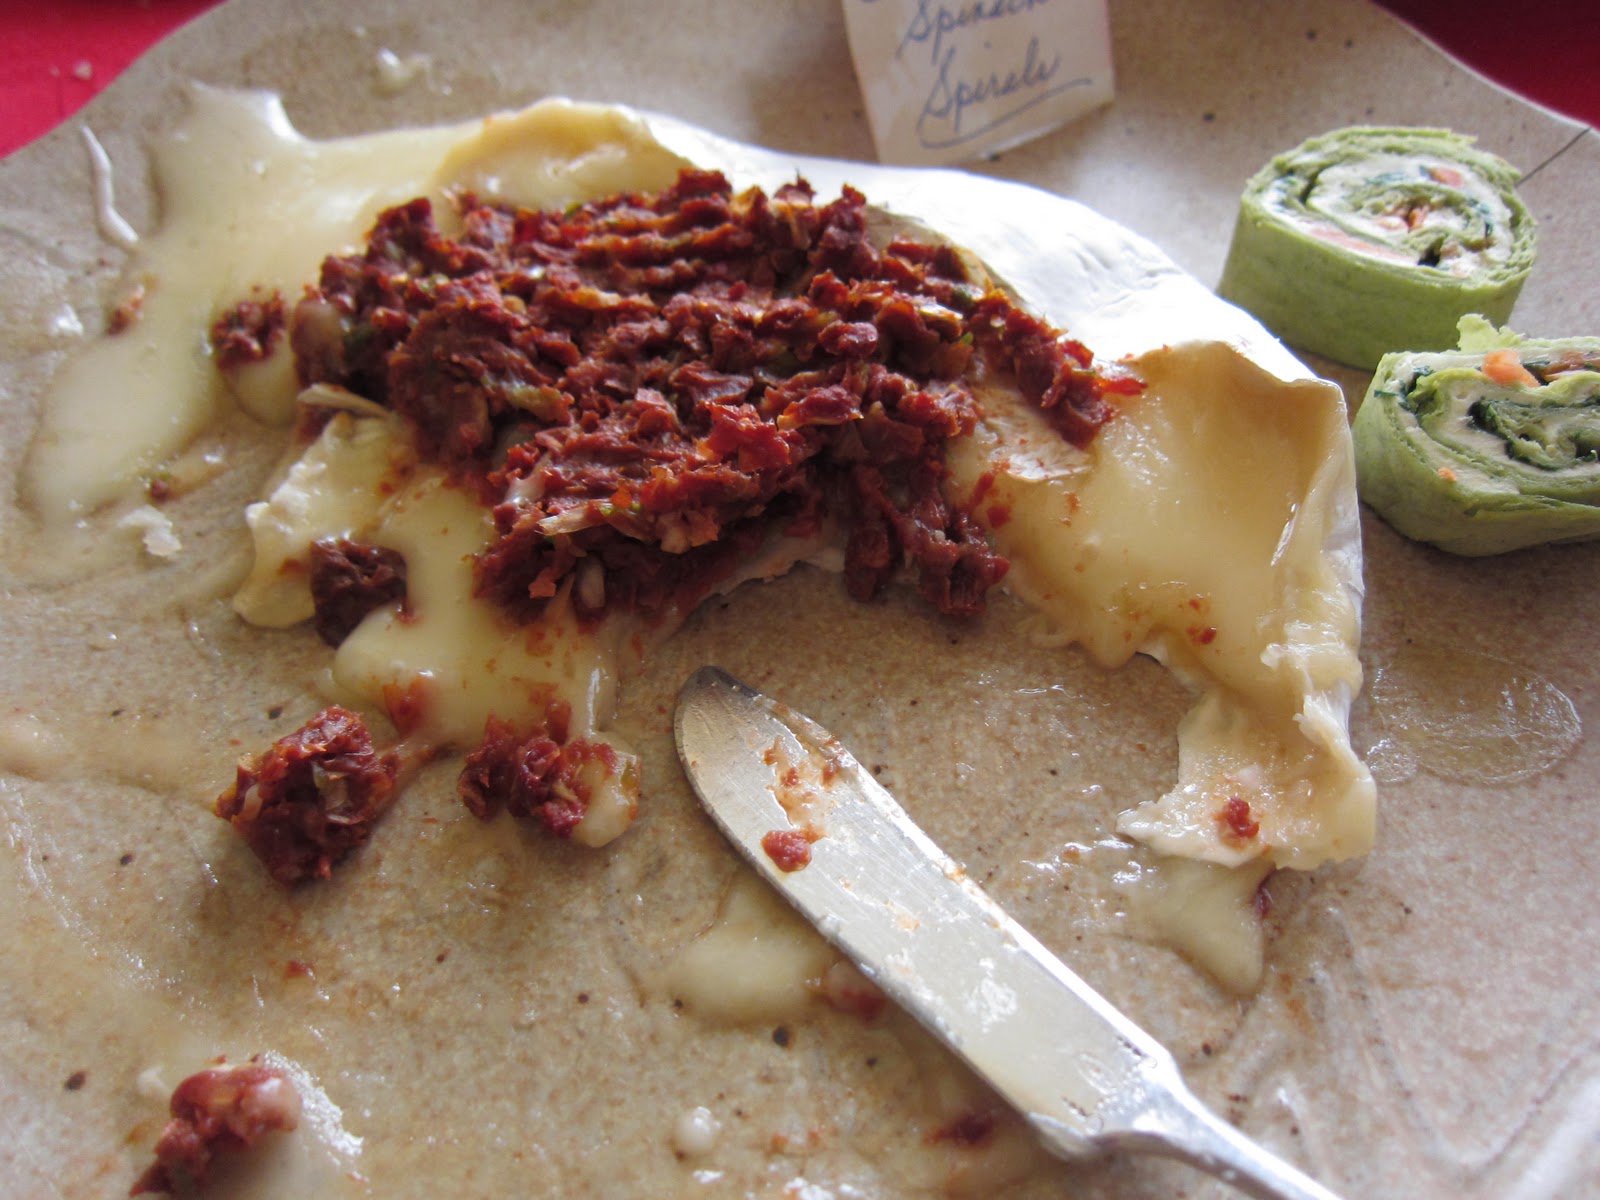
This year, someone brought brie with what I think was a sundried tomato spread on top. It was phenomenal with some wheat crackers. Behind are pinwheel sandwiches - I think that'd be a great little bento treat. They're very colorful, light and fun, but the creamcheese gives it a hint of protein so they're substantive too.
The pigs-in-a-blanket are a mainstay of the Burlington party. They're there every year, and they go SO FAST (there was only one left for the photo!) I'll admit, they're a bit pork-heavy for me, but I have one every year anyway. It's a guilty pleasure.
The little sign next to this one said "marinated goat cheese" and I thought it was my aunt's recipe, which calls for a variety of olives, but this seemed to be more herb and onion-heavy. It was a nice combination.
Oh, I honestly don't remember. I believe it was a salmon spread? Either way, it was delicious. And the chives are a lovely garnish.
Someone made a variety of little pastries that were to die for. Some had pork, some had spinach. They were all very delicate and very rich. I need to learn to make a flakey pastry crust like this so I can make little turnovers: again, perfect for bentos. This meal is full of lunch inspiration!
Like I said, it's supposedly a light meal because it's all finger-food, but this is not a meal to mess with. Very rich, very heavy... pretty much 100% "guilty pleasure" territory.
*Yes, Brandon has been to Burlington. ;-)
I just love the atmosphere. People mingle around the room, chatting and catching up. And I've heard it said multiple times that if you bother to bring a boyfriend or girlfriend to Burlington, it had better be a serious relationship, because otherwise what's the point of overwhelming them with so many relatives!* It's a truly, truly crowded party.
Tinsel! I just love it.
But aside from seeing all my great aunts and uncles, one of the things I like about the Burlington party is the creative food. It's all finger-food, and it's all insanely rich. I was able to snap a few photos after the crowd had cleared.
This year, someone brought brie with what I think was a sundried tomato spread on top. It was phenomenal with some wheat crackers. Behind are pinwheel sandwiches - I think that'd be a great little bento treat. They're very colorful, light and fun, but the creamcheese gives it a hint of protein so they're substantive too.
The pigs-in-a-blanket are a mainstay of the Burlington party. They're there every year, and they go SO FAST (there was only one left for the photo!) I'll admit, they're a bit pork-heavy for me, but I have one every year anyway. It's a guilty pleasure.
The little sign next to this one said "marinated goat cheese" and I thought it was my aunt's recipe, which calls for a variety of olives, but this seemed to be more herb and onion-heavy. It was a nice combination.
Oh, I honestly don't remember. I believe it was a salmon spread? Either way, it was delicious. And the chives are a lovely garnish.
Someone made a variety of little pastries that were to die for. Some had pork, some had spinach. They were all very delicate and very rich. I need to learn to make a flakey pastry crust like this so I can make little turnovers: again, perfect for bentos. This meal is full of lunch inspiration!
This is a mere SAMPLING of the desserts that were there.
Like I said, it's supposedly a light meal because it's all finger-food, but this is not a meal to mess with. Very rich, very heavy... pretty much 100% "guilty pleasure" territory.
*Yes, Brandon has been to Burlington. ;-)
Thursday, January 12, 2012
Apparently Christmas Happened!
Wow. Funny thing about January: it flies by. We got back from break and we have both just been swamped with work. I'm sorry for the super-delayed update. So, now that we're halfway through January... who wants to talk about Christmas dinner? Anyone? No one? Too bad, it's all I've got.
When I go home for holidays, I often take photos of friends and family, only to get back and remember that people don't like me posting photos of them on the internet. This year, I made sure to take some pictures of the food and decor, too, so I'd have something to blog about.
When my mom and I arrived in Kitchener/Waterloo, I saw what I feared might be the only snow I was going to experience all break long. So I asked my mom to take a picture of me outside.
As you can see, it's so warm out I didn't even need a jacket. So naturally, you can understand my concern that this would be my only snow of the season. Shortly after this photo was taken, we jumped in the car and drove to Toronto, where we did our Christmas Eve celebration with my extended family.
My mom asked me to help with the apple pies, which we brought with us. I can easily say this was the best pie crust I've ever made. I don't even know what I did differently, it was just serendipitous. I'll try to recreate it so I can take photos for you guys, but I can't make any promises!
My uncle's dog is named Angel, so my cousins decided she should have an appropriate costume for the party.
I tried to get a picture of dinner before the crowd got to it, but i was a bit too late. My aunt's turkey gravy was phenomenal: it was dark, rich and heavily seasoned. I sent her an email to ask what the secret is, she said white wine and fresh thyme. I'm officially adding it to my list of things to try!
I tend to geek out about the fact that we have a mixed family (I think I'm the only one who does), and I was in charge of bringing napkins, so I decided to have some fun with it.
It was a really hectic, fun party. One of my groups of cousins is a set of triplets, and they're 4 years old this year. Things are always busy, busy when they're around!
We actually had two more parties on Christmas weekend that I want to tell you about; the party on Christmas morning is an annual tradition with my extended-extended family and there are some inventive snacks and desserts there that I want to show you! So that'll be next time. Take care.
Saturday, December 24, 2011
Holiday Fun in Texas
I spent the final week before Christmas finishing up my labwork, cleaning my apartment, and packing. But there was also some holiday cheer, as well!
Rasika and I decorated the lab door for the annual door-decorating competition, and we won! The prize was a box of chocolate truffles. We shared them with the whole lab. Our door was called "Merry Mito-Christmas" because our lab studies mitochondria. We made a wreath out of green mitochondria, and put up ribbons made from the electron transport chain.
We had two days of Channukah in Texas before I left to spend Christmas in Toronto with my family. We almost forgot to do latkes! But one evening Brandon came home from work with some potatoes and applesauce. I was THRILLED. I went around telling everyone my boyfriend had bought me "a lovely bouquet of potatoes." No one got the joke but me, but that's okay, I still liked it. ^_^
So, we had Rasika over, and we lit the menorah and ate latkes. I explained how to play dreidel, but Rasika said if we played I would cheat by reading the letters wrong! She's a goof.
It was really nice to have a proper Channukah before I took off for the chaos of Christmas/New Years madness. I'll do another holiday update after the New Year, when I'm back in Texas. Have a lovely holiday, everyone!
Rasika and I decorated the lab door for the annual door-decorating competition, and we won! The prize was a box of chocolate truffles. We shared them with the whole lab. Our door was called "Merry Mito-Christmas" because our lab studies mitochondria. We made a wreath out of green mitochondria, and put up ribbons made from the electron transport chain.
We had two days of Channukah in Texas before I left to spend Christmas in Toronto with my family. We almost forgot to do latkes! But one evening Brandon came home from work with some potatoes and applesauce. I was THRILLED. I went around telling everyone my boyfriend had bought me "a lovely bouquet of potatoes." No one got the joke but me, but that's okay, I still liked it. ^_^
So, we had Rasika over, and we lit the menorah and ate latkes. I explained how to play dreidel, but Rasika said if we played I would cheat by reading the letters wrong! She's a goof.
Showing off my mad Dreidel skillz.
It was really nice to have a proper Channukah before I took off for the chaos of Christmas/New Years madness. I'll do another holiday update after the New Year, when I'm back in Texas. Have a lovely holiday, everyone!
Subscribe to:
Posts (Atom)